Having layers of user interaction helps introduce content. I found a good example of this at fireship.io where when you hover over key words in the heading a gif pops up and follows the cursor. It only uses the x-axis and gives it just enough interaction to not be distracting.
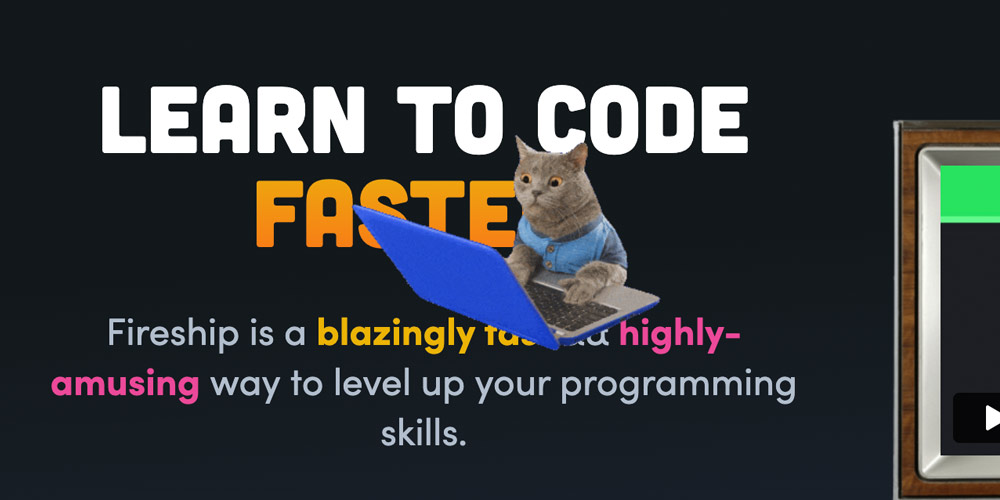
I thought this is a great way of adding a fun interaction to the site and helps tell a story. You could do different things with this idea like display a coupon code to the users and encourage them to find hidden treasures on your site.
The HTML, CSS and JS trifecta
I found we can recreate this with a pretty simple tool tip technique. Using a JS mousemove listener event with a for loop and the CSS display: property. The HTML get strung together keeping this to just a few lines of code and can add as many animations as needed.
All thats needed for the CSS is to display on hover and position.
.coupon-code:hover .tool-tip {
  display: block;
}
.tool-tip {
  display: none;
  position: absolute;
  bottom: 2rem;
  width: 200px;
  height: auto;
}
.coupon-code {
  color: var(--clr-example-one);
  cursor: pointer;
}
.coupon-code:hover {
  color: var(--clr-example-two);
  cursor: pointer;
}
The HTML is a heading tag with span's that hold the hover text and the image tag to display the gif's. I added line breaks after each word for display purposes. I would remove these for production.
<h1 style="position: relative; font-size: 3rem; margin: 0;">From
<span class="coupon-code">Creativity
<img src="/assets/pop.gif" class="tool-tip"></span>to <span class="coupon-code">Results
<img src="/assets/astronot.gif" class="tool-tip"></span>
</h1>
To get the following animation effect we need JavaScript. Using a basic for loop that on hover will add the event and users x position. For this example I needed to reduce the pageX distance that gets measured from the edge of the document by half. We will add this to the CSS left property.
First argument
In the listener event the first argument is the eventName that is a string and specifies the name of the event to listen for. This parameter is case sensitive!
Second argument
The second listener event argument is the function that is the call back for the event. The event will pass through the function and gets attached to the pageX property that works with the mousemove event.
Third argument
The third and final argument false is the default and is for the order in which the listener is going to fire. There is false that is set to bubble and thattrue is set to capturing.
Bubbling is when the event firing order starts from the bottom elements and then works it's way up the HTML structure. Capturing is when the event firing order starts at the top and works it's way down through the HTML structure.
This is good for when you have more than one event listener running. For this example we only have one event listener so where not using this last argument.
var toolTip = document.querySelectorAll('.tool-tip');
document.addEventListener('mousemove', funHover, false);
function funHover(e) {
  for (var i=toolTip.length; i--;) {
    toolTip[i].style.left = e.pageX/2 + 'px';
    //tooltip[i].style.top = e.pageY + 'px';
  }
}
Hover of the highlight text to see the effect.
Example
From Creativity  to Results
This is a really efficient little bit of code for such a cool interaction. I have seen this type of user interaction recently getting more popular. It's something that I am calling easter eggs. Fun little animations and interactions that are just enough to encourage the user to want to see more.