I was recently working on a WooCommerce auction site and the WooCommerce Watchlist was not working. There was also a YITH Wishlist pluging that someone was trying to use that was also not working. I was able to get rid of the YITH Wishlist plugin and integrate the WooCommerce Watchlist.
So if your WooCommerce Watchlist is not showing in the user account dashboard menu the quickest and easies way to get it working is to develop it into your site.
To do this we need to add some code to the functions.php in your child theme or if you don't have a child theme in the parent theme.
This procedure can be broken down into two main steps. First add the menu item and then create the endpoint and the view.
Add dashboard menu item
First we are going to create a function with the WordPress add_filter function. This will allow us to tap into the WooCommerce account menu items via our theme and make changes.
// Add Watchlist
add_filter( 'woocommerce_account_menu_items', function($items) {
    $my_items['watchlist'] = __('Watchlist', 'woocommerce');

// Move the Watchlist up the menu
    $my_items = array_slice( $items, 0, 1, true ) +
        $my_items +
        array_slice( $items, 1, count( $items ), true );

    return $my_items;
}, 99, 1 );
This function adds the WooCommerce Watchlist to the dashboard menu. Then it uses the array_slice function to move the Watchlist menu item to the second position in the menu.
Now we need to bring the Watchlist into the dashboard view.
A easier option would be to create a new page and link to that page and show the Watchlist on that page. But we want to show the Watchlist in the dashboard for a better user experience.
So we need to create a endpoint and view file for that.
// Watchlist End point
add_action( 'init', function() {
    add_rewrite_endpoint( 'watchlist', EP_ROOT | EP_PAGES );
} );
This is going to initialize a new action and that action is going to create a new endpoint which in this case is watchlist.
So with that being done we need to save / upload changes and go to Permalinks and Save changes. That will then refresh everything and make sure that our new endpoint is being registered and in place.
Create the dashboard view
The second part is to tell it where the endpoint is going to be stored.
// End point file
add_action( 'woocommerce_account_watchlist_endpoint', function() {
    get_template_part('woocommerce/watchlist');
});
Here we create another action that is going to use the WordPress function get_template_part linking a php file with the name watchlist.
Now we need to create this file and use the WooCommerce short code to load our Watchlist. Put the file in a woocommerce folder in your child or parent theme.
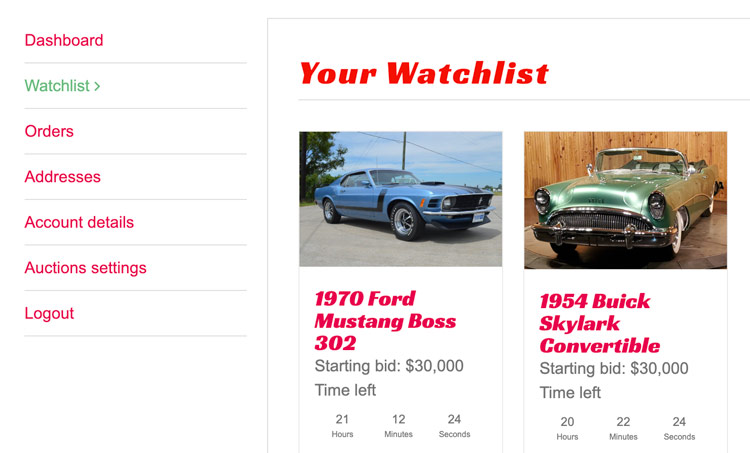
<h2>Your Watchlist</h2>

<?php echo do_shortcode("[auctions_watchlist]"); ?>
And that is it! You should now see your Watchlist working in your dashboard. Here is the final code.
// Remove Downloads from dashboard
add_filter( 'woocommerce_account_menu_items', function($items) {
    unset($items['downloads']); // Remove downloads item
    $my_items['watchlist'] = __('Watchlist', 'woocommerce');
    $my_items = array_slice( $items, 0, 1, true ) +
        $my_items +
        array_slice( $items, 1, count( $items ), true );
    return $my_items;
}, 99, 1 );

// Watchlist End point
add_action( 'init', function() {
    add_rewrite_endpoint( 'watchlist', EP_ROOT | EP_PAGES );
} );

// End point file
add_action( 'woocommerce_account_watchlist_endpoint', function() {
    get_template_part('woocommerce/watchlist');
});
Conclusion
Although the WooCommerce Watchlist is a Pro feature the process for adding any type of feature to the WooCommerce dashboard is the same. So your can just replace Watchlist with your needed feature by following these steps.