The Bezier curves are used everywhere in design programs like Illustrator, Blender and typeface design applications. It gives the ability to draw smooth, beautiful curves and scale SVG graphics as well as fonts to any size. We also use it to calculate timing for CSS and JavaScript.

It started back in the 1960's when the French engineer Pierre Bezier was designing car bodies for Renault using some of the earliest computer generated software.
He realized it was really hard to draw curves with computers so he decided to come up with a algorithm, and in doing so changed the course of history.
This was an incredible achievement in the field of software engineering and took polynomials to a whole new level.

To create a Linear Bezier draw a line with a starting point and ending point.
Then add a third point somewhere on that line to calculate the intersection between the two points.
This third point is called a "t" value, that is a value between zero and one, similar to a percentage. This calculation between the two points is called linear interpolation, or lerp for short. The Linear Bezier formula is:P = (1-t)P1 + tP2


Now if we add another point to the line, each of the line segments will have their own interpolated points and lerping "t" values.
Now we connect the two interpolated points with another line, segment, and add a point on that line, that also lerps based on a "t" value.
Here you can see that it follows a very specific path.
This path is a Quadratic Bezier Curve and uses this formula:P = (1−t)2P1 + 2(1−t)tP2 + t2P3

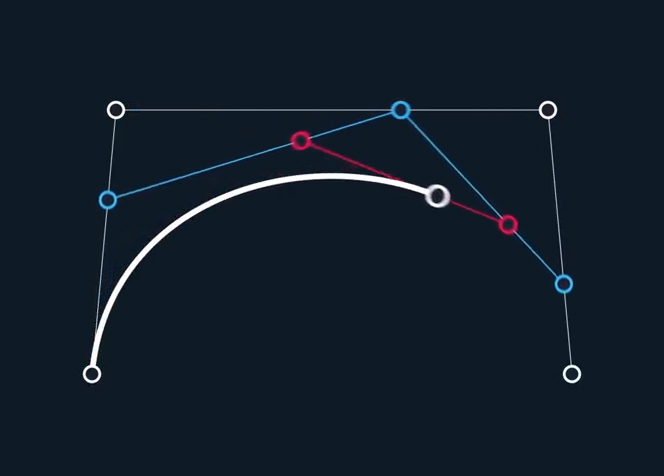
We can repeat the same process by adding a fourth point to the line.
Here we add three points, connect them, add two points, connect those, and add the last point.
The last point will follow the path of the Cubic Bezier Curve using this formula:P = (1−t)3P1 + 3(1−t)2tP2 +3(1−t)t2P3 + t3P4
What's beautiful about this construction is that it works no matter what points we use. We can change the shape to anything by following the same rules and it will give us a smooth path.
Interactive Bezier Curve Animation
The Cubic Bezier Curve is the most commonly used curve in graphic software. Try this interactive animation to see how the software creates the curves.
Please use a desktop or tablet browser for full functionality
Drawing Beautiful Bézier Curves
Bézier curves can be frustrating in the beginning and are a bit of an art form. Luckily there are some easy rules to follow to keep things more consistent.

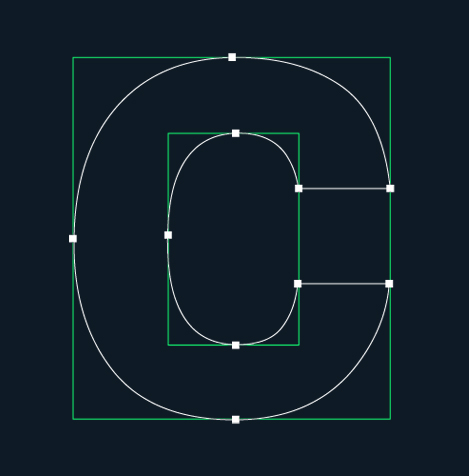
Use just the right amount of points. A great rule to follow here is to imagine your shape in a box, and only add points to the places where your shape touches the box.
You can also think of it as placing your anchor at the outer most edge of the line.

Then align the anchor point handles with the box as needed. Use the "shift" key while dragging a handle to the Bézier handles to 90° angles.
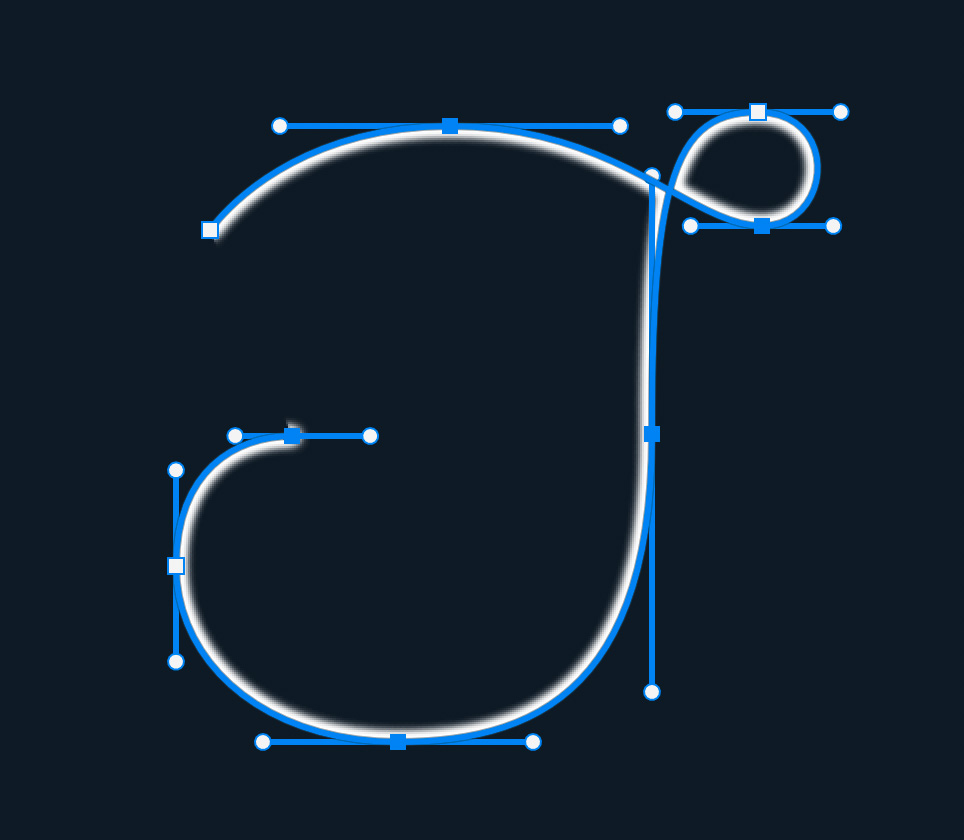
As a general rule, handles should never cross each others path. The handles should also be of relative equal lengths.
Using The Photoshop Tools
Bézier Curves are made up of anchor points and handles. There are three important keyboard keys to working with the tool that are:
"Shift", "Control", "Command", "Alt" or "Option"
Using the Pen Tool in Photoshop is a pretty universal graphic tool for learning to create these vector curves, so here are some Photoshop tips to use.
Control One of the Handles
Using the Convert Anchor Tool just by clicking on the handles, or with the Direct Selection Tool by clicking on the handle while holding the "Alt" or "Option" key. To reconnect the handle back at its current state click the handle again while pressing "option".
Remove One of the Handles
Using the Pen Tool, click on the anchor point while holding the "Alt" or "Option" key.
Add Both Handles Control Back to 180 Degrees
Using the Convert Anchor Tool clicking the anchor point and drag.
Highlight Multiple Anchor Points
Using "Shift," click and drag with the Direct Selection Tool you can highlight multiple anchor points.
Create A Brush Stroke To Follow A Path
Once you have your path created, go to the Brush Tool or press "b" on the keyboard. Now set the size, hardness, opacity and so on. Then go back to the Pen Tool by pressing "p" on the keyboard. Then right click and go to "Stroke Path" and choose Brush.
Cut Out Around An Image
Trace your image with the Pen Tool then press "command" + "enter" or right click and select "Make Selection". Then once you have your selection, click on the "Add Layer Mask" button in the Layer Window.
Conclusion
Bézier curves are another great example of mathematical beauty. It’s fascinating what such a simple function on some points can achieve. Whether it is design or engineering the Bezier Curve is a really powerful tool that allows us to be creative and explore endless mathematical possibilities.