It is common to work with APIs as they are a big part of the web. APIs that I commonly work with are the Google Business API, the WordPress Rest API and Jamstack APIs. They are great when you need them and open up all kinds of creative solutions for development.
Simpler more static APIs, that aren't getting updates in real time and requesting data based on a query that generates dynamic results, are pretty straightforward. They are a good way to get started working with and learning APIs. You can simply pull in the data from the prebuilt API and render the content to HTML.
If you are creating a full application with Express JS or Netlify Functions, this can quickly get a bit more complex. Following the above schematic will help save you from the clumsiness of trying to visualize such a convoluted flow of information.
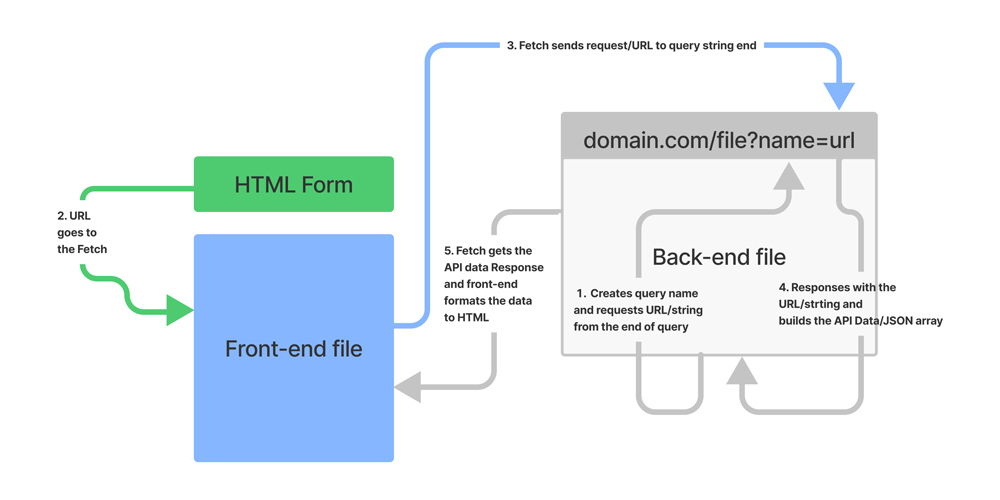
5 Steps to Using Express or Netlify Functions for APIs
This example was the flow of data for a dynamic API I recently created. The application has an HTML input form that gets information about a website URL. It then runs through the website and scrapes it for information and creates a dynamic API/JSON array. Then it formates the data and renders it to HTML.
Web scraping is a quick way to create dynamic data, in that you can think of the web as a giant database to create APIs from. APIs typically are created from database servers but can apply to all kinds of usage scenarios.
1.Create Query Parameters
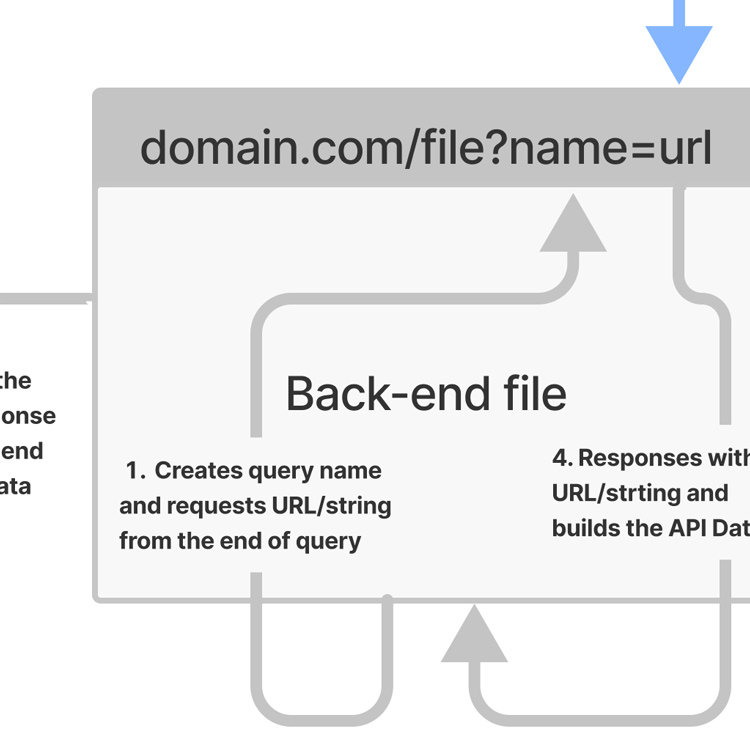
The back-end JS file creates the query name and requests the URL/string from the end of the query. Here we named the query parameter name and that gets tagged onto the end of the url, where the back-end file is stored.
A query parameter name starts with a question mark ? and is followed by the = like this: ?name=
Using Node.js and Express
Here we are creating a request and response function with Node.js using Express. Then we can assign the query parameter called anyname to the end of the URL.
app.get('/api/test', async (req, res) => {
    const results = await pa11y(req.query.anyname)
    res.status(200).json(results)
})
This is what that would look like in the address bar:
example.com/api/test?anyname=example-to-run.com
The node.js module pa11y then runs the response string and creates the JSON results.
Using Netlify Functions
With Netlify Functions we can use the event.queryStringParameters object available inside the handler function.
exports.handler = (event, context, callback) => {
  event.queryStringParameters.anyname
  //do something with it
}
This is what that would look like in the address bar:
example.com/.netlify/functions/filename?anyname=example.com
2.The HTML Form and JS Front-End
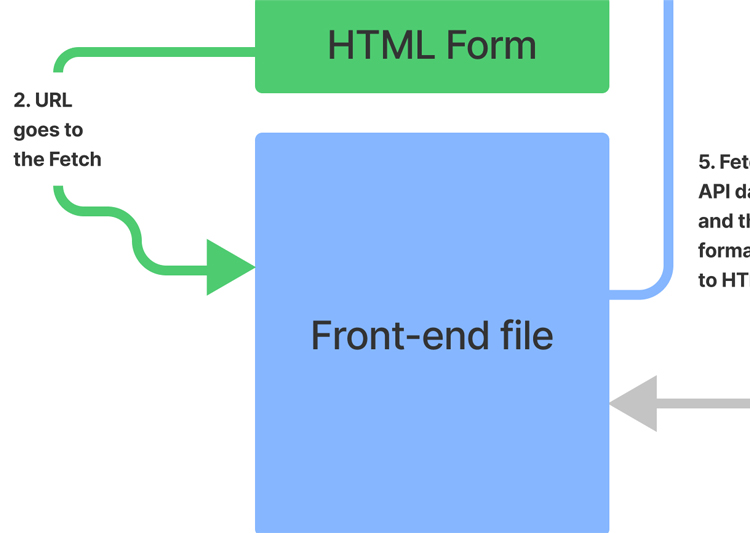
Now we jump to over to the front-end HTML form input where we submit the information. In this case it is a website URL.
We use the form input id attribute that the querySelector returns the value from.
<form id="form">
    <div class="input-group">
		<input
		type="url"
		id="url"
		class="form-control"
		placeholder="Enter a website..."
		/>
     <button class="btn-primary">Submit</button>
   </div>
 </form>
As a bonus you can use the onfocus="this.value=''" event in the input to clear the form when the user clicks into the input field.
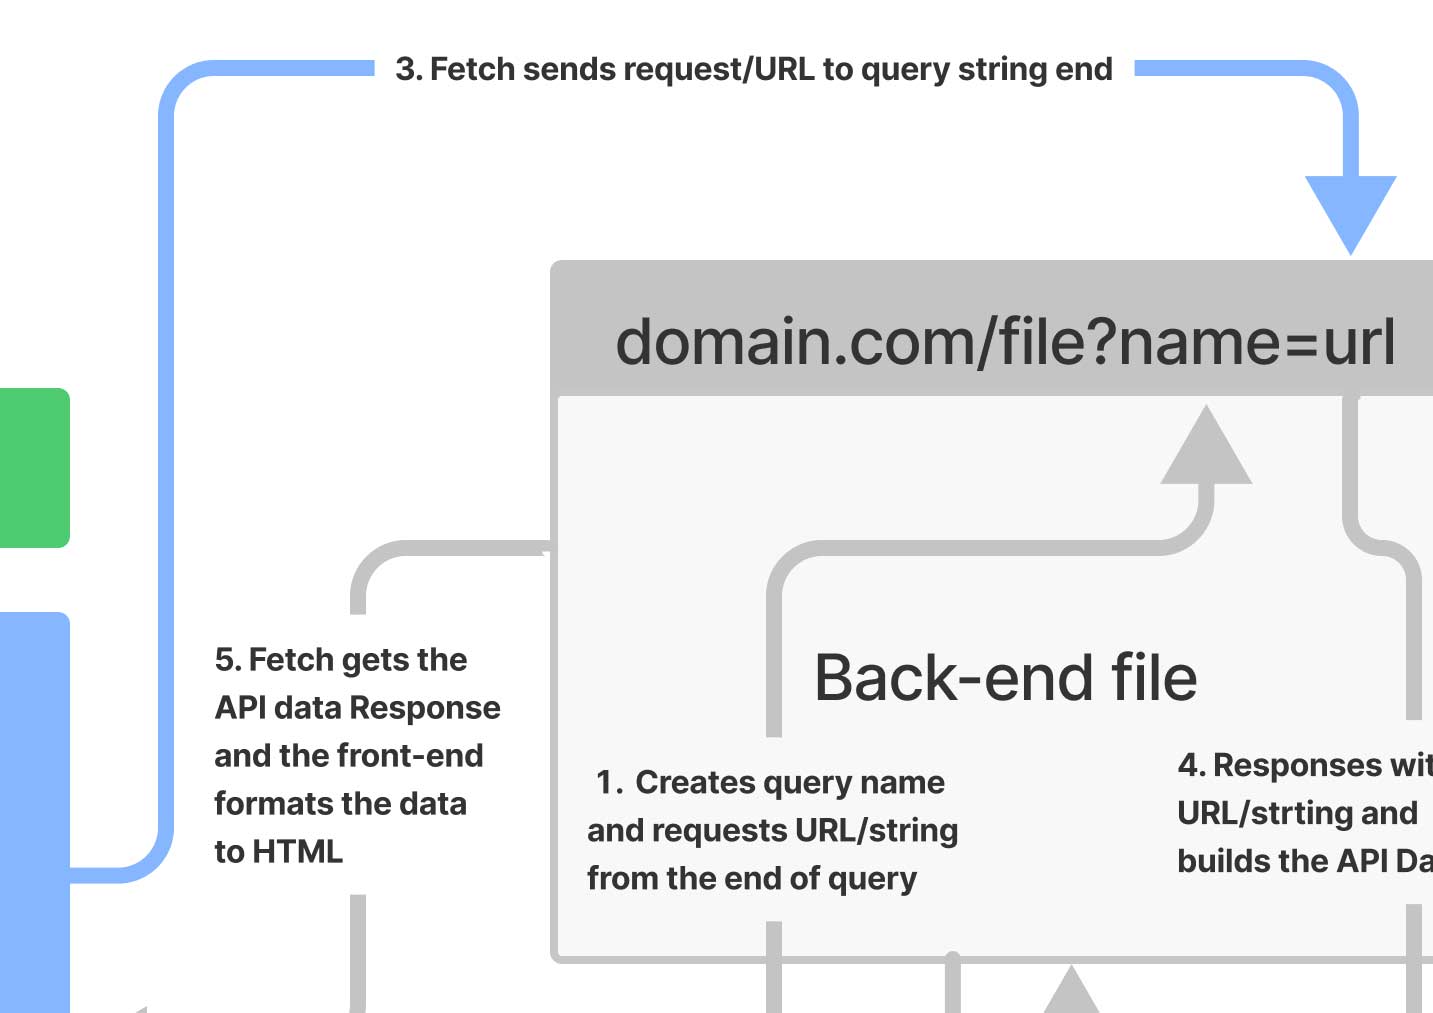
3.Front-End JS Request to the Back-End JS
Run the front-end JS script at the bottom of the HTML file.
Here we get the value from the HTML form and send a request to the back-end query string by using the Fetch API.
The Fetch API gives us access to manipulating parts of the HTTP pipeline.
Front-end JSconst testMyApi = async (e) => {
e.preventDefault()
const url = document.querySelector('#url').value
if (url === '') {
} else {
const response = await fetch(`/.netlify/functions/filename?anyname=${url}`)
if (response.status !== 200) {
} else {
const data = await response.json()
console.log(data)
// Do something with data
}
}
}
document.querySelector('#form').addEventListener('submit', testAccessibility)The front-end JS function flow of information works like this:
- The
addEventListeneroperator will run the testMyApi function on submit - The
testMyApifunction isasyncbecause we are making a fetch request. It will get the value from the form input - Then check if the value is empty
- If the value is not empty it will
fetcha response/send the value to the back-end function - Then get the data and
awaitthe response from the back-end and get the JSON data - From there we have the JSON data and can structure it to be displayed to the user
4.Back-End Respond to Front-End Request
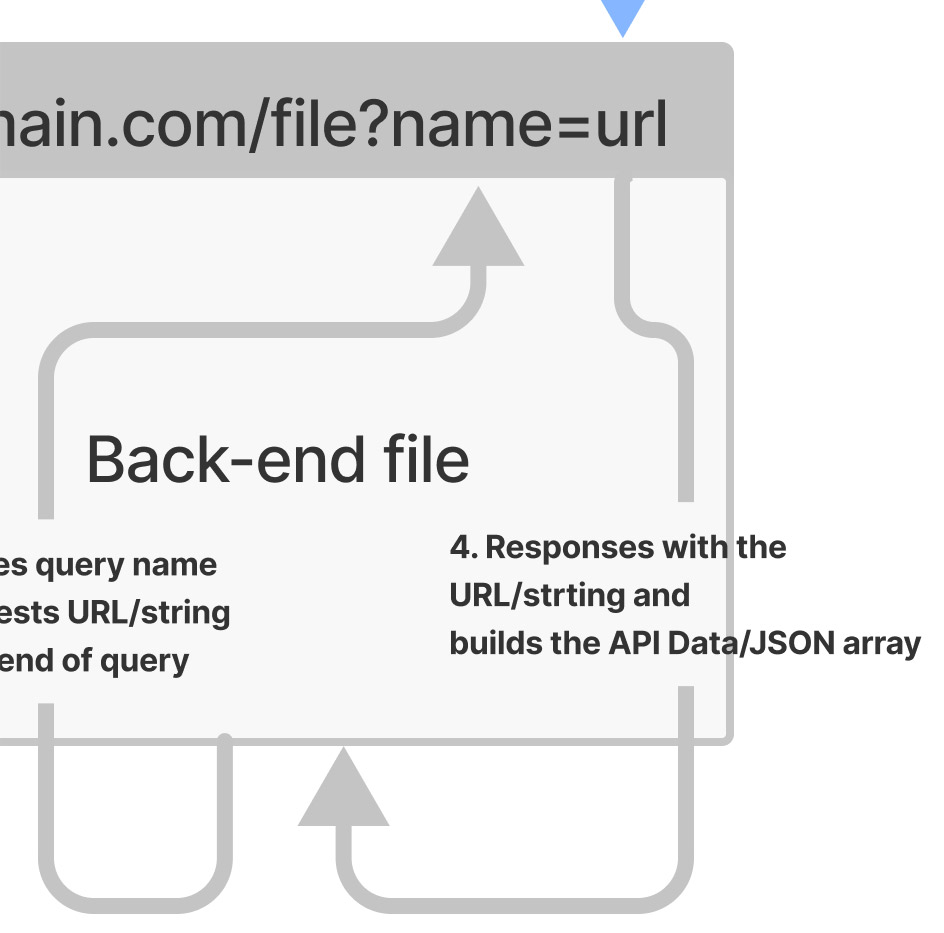
The back-end JS will respond to the front-end request.
Now we can get the request from the query string with a module like axios to do something with it. In this example we are taking in the URL and running it through the function yourFunction and outputting the result in a return body of a Netlify Function.
exports.handler = async (event, context) => {
  const querystring = event.queryStringParameters;
  const url = querystring.name || 'something when wrong';
  const html = await axios.get(url);
  //do something with the request
}
return {
statusCode: 200,
body: JSON.stringify({yourFunction}),
};We can hit the Netlify Functions endpoint by outputting the body data payload that is formated in a JSON array. The results can then be fetched in the response from the front-end JS.
Accessing the JSON Data in the Front-End
Here is the example data output of the body JSON array.
{"yourFunction":[{"firstItem":"The firstItem information", "secondItem":"The secondItem information"}]}We can destructure the yourFuction main JSON object and access the firstItem array of objects by:
const { firstItem } = await response.json()To get access to all of the array, we can destructure the whole array like this:
const { yourFunction: [firstItem, secondItem] } = await response.json()Now we can access each object by calling the object name:console.log(firstItem);
5.Front-end Response
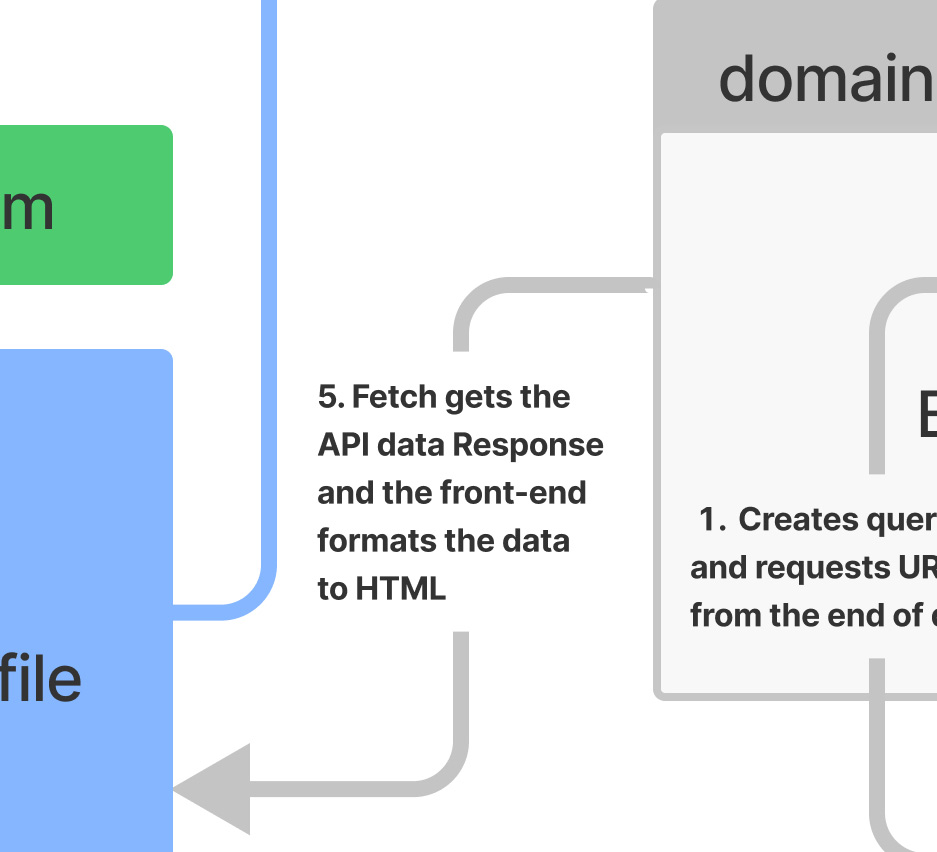
The front-end fetch request gets the Netlify Function event that is returned in the HTTP body.
The yourFunction needs to be specific to the name of your JSON object/data.
Conclusion
I hope this gives you a better understanding of dynamic APIs using the popular frameworks of Node.js Express and Netlify Functions. I wanted to show both examples side by side to give a better understanding of the concept. Using APIs gives us many creative options to how we approach dynamic interactions while using static assets!