The goal of building a custom WordPress site is to create a high performance site that is easy to manage and scale. Anytime you use pre-built themes or builders you are adding boilerplate features that are meant to quickly adapt to many types of situations.
Although, most sites are unique and have specific concepts and designs. By developing a custom WordPress site we can eliminate unused developments that will only slow down the site and make it harder to manage.
There is certainly risks to building a custom WordPress site, so it is important to follow the WordPress standards and to do testing along the way.
Pros to Building a Custom WordPress Site From Scratch
- Better performance, best practices, accessibility and SEO.
- The overall website and security are easier to manage and trouble shoot when there are issues.
- This gives us more opportunity for scalability and application development.
Setting Up a Local Environment
I will be using Docker for my local environment and I have a post on how to set that up and Install WordPress on Docker locally. I also have a tutorial on setting up WordPress on Docker with Docksal locally, that helps manage Docker for you.
Other local Environment Options
Lets get started with configuring for a clean slate
Once you have WordPress installed and running locally we can start the configuration process. These configurations allow for a clean slate starting point.
1. Install my starter bare theme
Install and activate the Starter Bare Theme that I created. This is the bare minimum files needed to get started for building a custom WordPress theme from scratch.
Download it from GitHub -> unzip and copy -> paste in the Theme folder and and Activate.
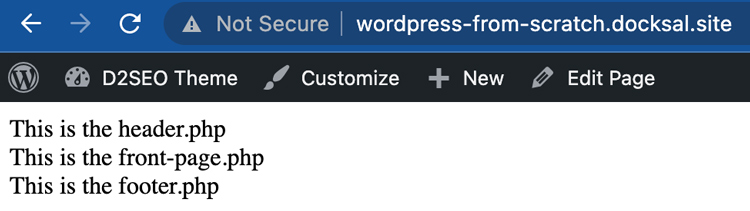
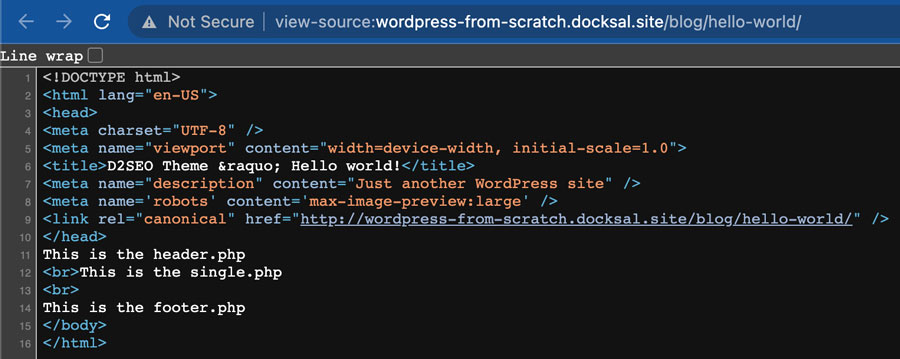
The Starter Bare theme files will only show the header, footer and the name of the file. This way we can create the site pages, categories and posts in the admin and see what files we will be working with before we start developing. Other than that, each file is blank and ready for a custom build.
The theme does have functions for disabling configurations needed in function.php. You can see these details in a blog post I wrote called, Disabling Unused WordPress Features.
The disabling developments in functions.php can be commented out, to turn them off. They are all stored in the inc folder to keep them organized.
2.Configure WordPress
Even if you plan to use some of the WordPress pre-configured features, I recommend disabling them to get started, it will be easer to test and trouble shoot any issues during development. We can always add these features back as needed, but it is best to remove them at this point before we start building.
Disable post revisions
In the wp-config.php file add the following right above /* That's all, stop editing! Happy publishing. */.
define('WP_POST_REVISIONS', false );This will turn off auto revision that can really bog down and clutter up the database. Otherwise every revision will create a new post in the post table.
Plugins
Because we will be doing custom HTML and CSS we can disable the Gutenber Block Editor by using the Classic Editor plugin. We can also remove the pre-installed Akismet Anti-Spam and Hello Dolly plugins.
In the admin go to Plugins -> Add New -> Search plugins -> Classic Editor -> Install -> Activate. Settings for this plugin are in the Settings -> Writing.
Setup homepage and admin settings
Now in the admin we can set our configurations.
Add New page called "Home" in Pages.
Now in Settings -> Reading -> Your homepage displays select -> A static page -> Homepage: -> Home -> Save Changes.
Media
Disable thumbnails by going to Media -> thumbnails -> 0
Disable Organized uploads by going to Media -> Uploading Files -> uncheck -> Save Changes.
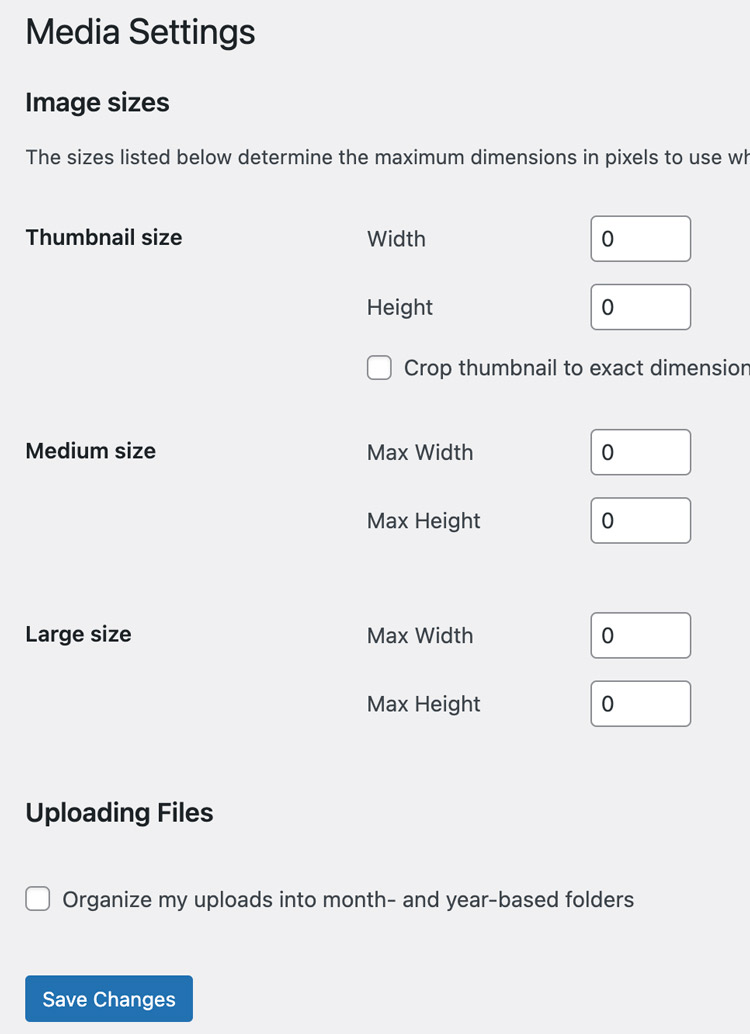
This will keep the media fold clean with only the images we upload. Here we will be managing our images to be sized for web, devices and responsive, so we won't need any cropping.
Permalinks
In Permalinks set Common Settings to Custom Structure and use /%category%/%postname%/ -> Save Changes.
3.Site Building
Now that we have the Starter Bare theme install and WordPress configured we can start site building. Here we can follow a sitemap plan for your website and create the admin pages, categories and posts for the project. I have a post on Create A WordPress Project Plan that will help organize your projects.
If you are going to be using custom fields like the AFC plugin, this is a good time to start adding the fields to your pages. Once we have the admin pages created we can move to development.
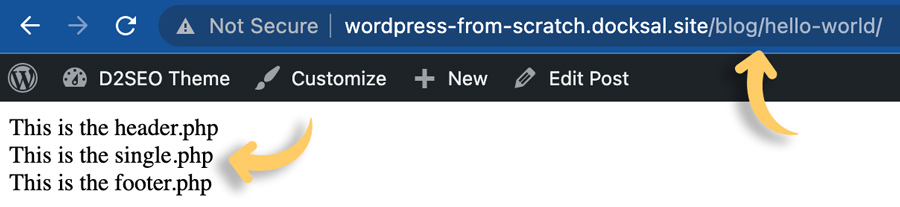
Click through the WordPress admin links to see your pages and posts. Here we can see the permalinks SEO friendly URLs and single.php are working.
Logout and Right click the browser window to select View Page Source. If you have worked with WordPress for any amount of time, I'm sure you can appreciate starting from a clean slate like this.
Now that we have a blank canvas to work from, it will be much easier to maintain performance, best practices, accessibility and SEO along the way.
What is next?
Next in Building WordPress from Scratch Part 2 we will create the page structure using Semantic HTML and responsive grid CSS. Starting with the homepage, that will set the stage for the rest of the site.